.-^ ^-.
Today, PhattKatt got some accessories added:
First things first: a trip to REI and Performance; then a bit of wrenching.
REI offered a great deal on Egg Beater cleats at $17.95 (still waiting for shoes!); they also had the Cateye mirror (great mirror for $7-!), a safety triangle, a spare SRAM quick-link, and a couple of reflective leg straps. Next stop; Performance - needed an Incredibell which was on sale and a pair of full finger gloves to replace my old ones. I also bought some bar ends that I didn't get to use (*).
Once home, I go to add the mirror using the Forte bar end (*). HA! For some reason Big Cat decided the horizontal steering arms didn't need to be "
handle bar" sized. Big bummer; no bar ends... So I opted to put the mirror on the left vertical handle end:

I've used this mirror on the ABTT and it is very appropriate for cycling. I didn't want to ruin the fixed SRAM grip so I fitted a foamy as you can see above.
Next; mount the Incredibell (real tough - one screw). Indeed a nice loud bell with a rotating dinger for adjustability. If only people would heed a dinging bell! Oh well; the steering arm upright is now full:

I went off on a tangent and mounted the flag. I had a flag laying around but it was to short to put in the stock location. I also wanted it to be quick release so I put a spare seat clamp on the bottom of neck rest. It has a quick release and was now tall enough so it did not poke me in the eye! I didn't post a picture because I am not quite happy with it yet.
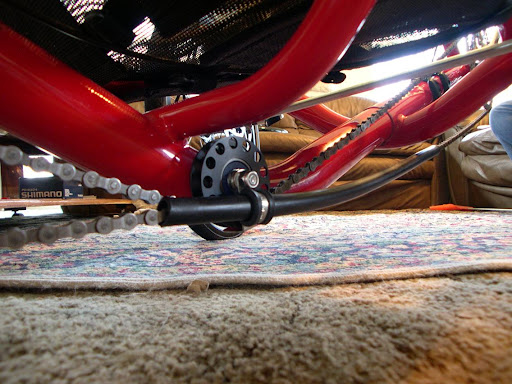
Next, I dug back into my box of goodies and commenced replacing the stock tie rod. In Big Cat's wisdom, they opted to go for two right hand threaded rod ends. This means you have to remove one rod end from the steering arm to make the toe adjustment. I knew all about procedure and also understood why Big Cat would do this
but I had already worked out a left and right hand threaded tie rod solution and happened to have the materials to make one for PhattKatt. I use hollow aluminum structural tubing that is properly sized for tapping a 5/16-24 thread. I had a tie rod that was already tapped but was about 3" to long so I cut it to length and re-tapped the one end. After this, I dig through inventory and found the aluminum hex nuts and the lock washers. Put everything together and verified nothing bound up. Working like a charm!

These studded rod ends allow for 50 degrees of offset. This means that throughout the entire steering range (
which is when the tires hit the seat frame), the rod ends never bind. Stock rod ends have very little offset capability which causes the rod end to bind on the steering arm which can loosen the tie rod's jam nut. Loose jam nuts on a two right hand threaded tie rod does not change the overall length of the tie rod. Conversely, a tie rod with left and right hand threads needs to make absolutely certain that the jam nuts remain tight. This is easy to do IF the rod ends do not bind. You can see in the picture the small hole in the tie rod. This is to help loosen the jam nuts if necessary. The full motion of the steering is a bit smoother now at the extremes of the steering limits:

BTW: Do note the thread size Big Cat choose for their rod ends. These are plenty beefy (3/8" UNF me thinks!) ...and the tube is also a lightweight aluminum: so I commend Big Cat for their robust design. However, $2- more for the rod ends could have had studs added and go back to left and right hand threads. It is the studs that allow for the larger offset. Maybe someone at Big Cat will read this and rethink this option. For now, I will enjoy the fruits of this effort as I do for the ABTT also.
PhattKatt also came with a Cateye wireless computer. I know, "
wireless, bah!" but hey, free (
included) is a very good deal. First things first, mount the sensor... Yuck! But again my ever growing spare parts bin has the solution in hand. An aluminum bracket I used for the ABTT steering upgrade
happened to fit nicely under the left rod end; and the sensor fit nicely below the bracket... until I thought about transporting the trike with the front wheels removed. This setup would leave the sensor vulnerable. So I moved it to the right side; accepted the less that esthetically perfect bracket implementation and now the sensor is above axle. I could hear the clicking of the reed switch so I knew I was getting a clear reliable signal:

Next; Computer... the horizontal steering arm? "...
would be close to the sensor..." but it looked awkward there. "
27" unobstructed range"; hmmm. So I zip tied the mount to the frame whiuch is close enough to the sensor and hopefully not overly obstructed. The computer picked up the sensor signal in my living room so hopefully it will work in the field as well:

Last but not least, the Zefel Road Morph also found its way here with the trike. I have the Mountain Morph for the ABTT and it came with an incredibly sturdy mount. I opted to give it a shot on PhattKatt by strapping the pump to the chain stay:

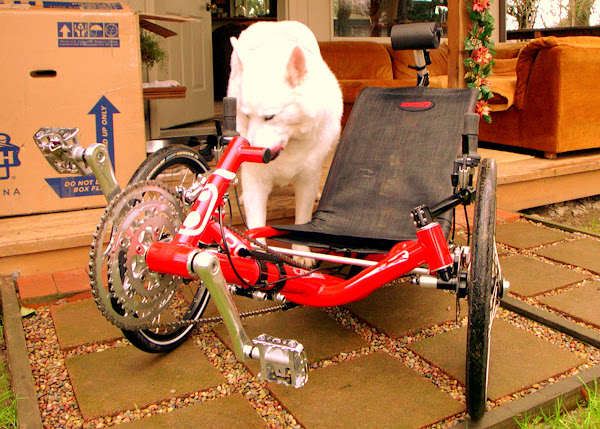
Did you note the nice fit of the rear fender? PhattKatt came with a full set of fenders too. I'm not mounting the front ones yet since the tires make great
backup-handles.
In the meantime, I ordered a few things from Nashbar: A helmet, frame bag, oiler, and a few tools. I ordered the full '05 Bell Metropolis kit at $49.95 for me last year and really like the helmet. It works very well with neck rests on a trike compared to road bike helmets. Today I order one for my wife without the accesories for $29.95! She is welcome to use my helmet accesories. She will definitely be using the light that came with my helmet! That MARS 3 is very bright.
If you are still reading this entry, you are really hard core! ...and I appreciate that so please leave your comments.
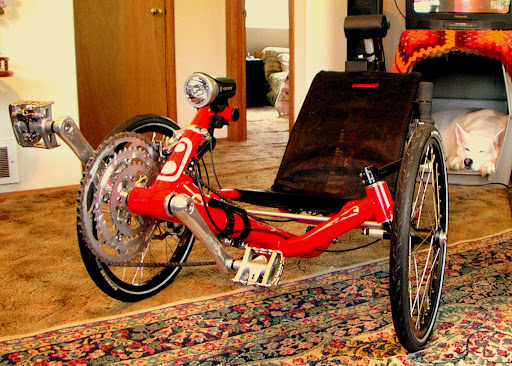
Here is a pic of the trike after todays wrenching sessions:

Now all we need is some sunlight and take kitty out for a spin :)