Monday, January 28, 2008

More Bling!

I didn't tell you about our outing on Friday; a nice sunny trip along the Rock Creek Trail. One of Hillsboro's little feather in the Park Department's cap. Not a long trail but definitely worth mention. PhattKatt behaved marvelously!

Today, new bling in the mail! Yes... the people's of the Catrike forum were RAVING the N-Gear Jump Stop. Of all business models I've ever run across, this one is quite unique. Supply your address and the size of your derailleur post, and within a few days, you too will have a Jump Stop in your mailbox. I didn't mention payment yet, huh? That's right; like the way it works and pay just $10- or send it back. See the website: http://www.n-gear.com/ ...and Nick even accepts PayPal!

Here is a detailed look at what you get with the Jump Stop by N-Gear:


Installation was pretty darn simple. Even the nut is machined to help tighten up the clamp for a sturdy secure fit of the clamp and the jump guard. And the Allen wrench was even included! If you can't install this little device, you should throw away all your tools!

Provided below is a nice closeup view of the Jump Stop on the PhattKatt ['06 Catrike Road]:


I am quite certain that this $10-, if only ever needed once, will save me 10 times that much in residual grief. And this disclaimer is also necessary: I do not now, nor have I ever had and connection with N-Gear. I do support products and developers who make our lives better at a fair price.
Thanks Nick!


Peace Out!

Wednesday, January 23, 2008

S.N.A.I.L. mail...

I don't remember having to wait for parts as long as I've waited for the bottle cage mounts. Maybe it's just the cabin fever ...after all... the package did come all the way across the country. And it made it in one piece! Oh, yea... what harm can you do to a few pieces of aluminum in a box. Never mind, don't answer that!

First things first; the "other" trike got its bottle cage attached. Nice simple handle-bar mount for easy access. No more reaching over the derailleur post; Yippee!

As for PhattKatt, we found an interesting bottle mount adapter. Almost a by-product of a Topeak quick-mount system that could have a real niche in the recumbent fold. Take a look:


...and Package for recognition: [I've only seen this on amazon.com, BTW]


The horizontal stem is mounted onto the derailleur post similar to how the Minoura mount works but can only be attached in the orientation shown. This mount also comes with two strap lengths for different size posts.

It was a little unnerving tightening the strap as you really never get that "tight" feel. But you can easily tell when it is "tight enough". The angle of the upright bar can be adjusted. This system uses a old handlebar wedge system to lock the upright bracket:


Once the system is completed, with the nice matching red bottle cage, it is reasonably sturdy. The whole purpose for this particular location is accessibility:


We'll see if this needs to be adjusted some but it is an interesting mount and should serve well to keep the bottles from leaking around the lip. I could see something like this strapped straight to the main-tube! Anyway, for $10- it is worth a try. Stay tuned for the next ride report to know if it will stay there:


The other clamp on bottle mount will have to wait until tomorrow. It's been a long day!

Out for now.

Sunday, January 20, 2008

Meet my big brother

Today started like most days this time of year... gray, cold, "thick" with humidity. PhattKatt had resigned to resting again today. The people left and the beast was eyeing me as it usually does.

When the people came home, a ray of sunshine found it's way into the window. And another... and another... and lo, a w.h.o.l.e patch of blue appeared. Of course I began making noise. And alas, I was again brought out into the light. Whooohooo... we're going riding!

You know your Catrike does this... always wanting... always. Not much different than the beast who watches it. Always waiting for that magic jingle of the leash to set the heart aflame.

The ride was still cool and the clouds were fleeting past the fiery ball in the sky, humidity still thick. But how could someone complain when the roads are nearly dry, the sidewalks empty, and traffic following its own course.

Today was a good day to get out for a short jaunt around the neighborhood.

Meet PhattKatt's bigger brother; the Actionbent trike affectionately known as the ABTT:


I love these surprise outings!

Saturday, January 19, 2008

...old man winter

Winter in the great Northwest is a pussy cat when looking at alternatives. Yet the cabin fever is just as real; as if blizzards were blowing and gales were flooding the streets. At least, we'd have something to watch... but no; a drizzle of rain and a peer of sunshine, and wet streets, and a chill in the air; simply not triking weather... YET!

So the people walked to the store and took their beast (dog) with them. The quest was for me, PhattKatt... to be seen. The people came back with a new and shiny present: The Blackburn MARS 2.0 bike tail light


After an hour of anticipation, finally I was fitted with my new glow:


Just kinda fills in the gap between the SMV triangle and the fluttery flag, now doesn't it? Not that this is unique of course... the *other* trike has one on the flagpole too.

For anyone that cares, these MARS 2.0 lights can be had for quite little as far as rear blinkies go. They run on 2-AAA batteries and have 3 modes... solid, all-blinking or random blinking and includes two amber lights facing forward. You see the little on/off button in the pix above. The mount is made with some strapping tape and an aluminum cable clamp. In order to change the battery, you must remove 4 screws but seems pretty well sealed from the weather.

I hear a little contemplation regarding my gearing was also considered. Not that I am sure fiddling with my good bits is required but this is what I overheard:

The stock gearing on this trike is pretty good. An 11-32 cassette and 30/42/52 chain rings on 130/74bcd crank arms. I'm assuming the cassette is a SRAM PG950 for the moment and the crank set is a 165mm Shimano Ultegra Octalink (v1) setup. Really nice setup. And for what it is worth, 165mm crank arms is not that common on stock trikes.

So the story goes that the SRAM 970 is an 11-34 cassette. Two teeth different providing a lower low. Rumor has it there is one in the house, somewhere.

Rumor also has it that there is a 24T chain ring in the house. But in order to make it viable, other chain rings would need to be replaced. The ultimate combination for the Ultegra crank set is 24/38/46. The third chart below shows that with a 24T chain ring and the 11-34 cassette, the climbing gear would be !13.2 Gear Inches (GI). That's better, lower, than the *other* trike! I'd definitely like to try that one on! Without delay... for your data crunching perusal:


The day that my bits will be messed with are a long ways off so for the moment all we can do is hope for sunny dry days... warmish ones. I hear the bottle cages are coming on Wednesday. Maybe another post awaits on that day. Now for another extended katt-nap.

PhattKatt Out!

Tuesday, January 15, 2008

Followup on a Promise:

I promised PhattKatt I would clean up the sensor bracket for the computer.


So today I remembered to put a few moments in at the shop and make the strap that would solve the engineering task at hand... a small hole and a bit larger hole 2-1/4 inches apart on a flat straight piece of alloy not to thick; not to thin. Sounds like a right proper engineering spec if I'd ever written one. Along with the hardware from the litter box, we ended up with this high tech space aged sensor mounting kit:


Next, remove the old bracket and put the new bracket in the small hole next to the rod end.

Anyone remember why we put the sensor on top of a bracket, not below on the left side of the trike? Yep, 'cause we want to transport the trike with wheels removed. We don't want to be knocking the sensor around and have it end up in spokes somewhere along the trail at the furthest point from nowhere... er... furthest point to somewhere... something like that.

So I install bracket with a 10-32x1/2" stainless steel socket button head cap screw a keps hex nut (hex nut with a built in star washer) and hold the screw head with the Allen wrench while tightening the nut. This way the strap doesn't move while tightening it. I'm also maintaining that 4-5mm of clearance between the sensor and the magnet all the while. The installation came out looking like this:


That should pretty much do it for catching up on my promises. Next will be the water bottle mounts when they come in.

Hopefully we'll have another ride report soon. Sounds like it will be cool but clearing for about a week. Let's see if some of that can be sunny enough for another outing. A Cat must strut her stuff, you know!

Sunday, January 13, 2008

The Mythical RA! Appears.

After a foggy cool morning... once again we were ready to curse the weather-guy for heightened hope for a trip to the beyond on our trikes. ...when alas... glimmer... a ray... indeed... yes... a patch of the great blue opens up in the early afternoon in the great Northwest!

PhattKatt had patiently been waiting in the dark corner of the office for days... weeks, actually. Its been fussed over... poked and tweaked, gadget ed and moved about. But today! today PhattKatt got to see the world! Or at least, 5 miles of it.

Destination; Dawson Creek Corporate Park:


Several miles of 6 foot wide MUP with the local library on the water, ducks and geese, and lots of local folk. Tunnels and bridges, uphills and down... a place to stretch the legs of critters long couped up.


As it rained yesterday and the fog was dripping wet just this AM, it was hard to judge the conditions on the ground. Only small patches of mud were encountered and no serious puddles were found anywhere. Wouldn't you know it... as puddles are great for washing tires off; especially that goose dung: Yuck!


On the way toward home, the same energetic pace continued on the road-paths back to the little hamlet of a town where PhattKatt now lives. The building in the next image is the Old Orenco Garage... now a shop of one, Merlin, who is an artisan skilled at wagon building, the old horse drawn kind. He is passing on the art to his offspring.


Tonight, PhattKatt will sleep well knowing at least a small part of the new world within its grasp. Now to dream of the next adventure.

Sunday, January 6, 2008

...and the rain continues.

"The grayness in the northlands seem forever."

Yet in the attic with a glimmering light, one can continue to perfect those things we may effect. Today was the choice day for correcting that which I mentioned earlier... the quick release flag mount.

Appropriately designed at Big Cat, the flag mount allows for a single bolt and lean the mount against another feature. Raising the flag mount to the head rest requires a similar feature once mounted. The preference for the higher mounting location is so that the top of the flag is higher from the ground then peoples' eyes. Safety equipment should also be used safely. I like having the tips of the flag at least 6'8" from the ground. Much higher, and most cars will not see it from their vantage point.

For transport reasons, the flag will need to be easily removed. Seeings how the flag pole diameter makes for a very snug fit in the flag mount, pole and mount are now permanently mated thank to a bigger hammer.

In the previous attempt, I tried to tighten the mount with only one screw and nothing to lean against. That idea was doomed to failure and as mentioned before, needed more effort. Today the quick release collar was modified with the Dremel cut-off wheels so that the flag mount would fit in the middle of the clamp.


The amount of material removed was a delicate balance between clamping tightly on the head rest post and still clamping the flag mount tight.

Here you can see how the tip-stop feature works on the head rest:


Along with finishing the flag mount quick release, the safety triangle was also added. The triangle has a strap on the back that is looped around the head rest post. At the top of the triangle, there is Velcro. Here is the final setup of the flag mount and the safety triangle:

Monday, December 31, 2007

Ridden by my new owner!

Today PhattKatt finally got the feel of its new owner. Yes, today the gears were shifted and the seat was sat in, and the wheels rotated with my wife at the helm.

My wife is a stoic of sorts. She is a wonderful lady who cares for me as no other could or even would, and I love her dearly for that and much more.

Anytime a trike was mentioned in the past, one would have to know her to know that the thought appealed to her. Today, learning how to shift and pedal, even though it was very cold outside and a short ride, was telling merely in the fact that nothing at all was said. Yes, this kind of joy needs to be held within. That tell-tale trike-smile did come through in glimpses. PhattKatt is a great fit for my wife... and the fitting continues.

First thing this morning was a trip to Performance Bicycle. We needed shoes that could be converted to clipless. Not knowing her true foot size, and the current sales, it seemed a good idea to see what was available.

Found was a pair of Diadora TrailBlazer Women's Shoes... that were $99.99 on sale for $19-! WHAT A DEAL!... and they fit like a glove. Needless to say, the ride today was NOT with clipless pedals since that is a day of learning on its own.

When we got back from the short cold ride, I decided to follow the instructions of the sales lady at Performance on fitting the cleats to the shoes. I offered my wife the fitting of the SPD that came with PhattKatt or the Crankbrothers Egg Beaters that also came with PhattKatt. She choose the SPD probably because they are also platform compatible. Next came the fun part...

Today is New Year's Eve... not April Fools! I scored the soul as instructed and tried to peel out the center. Then tried prying out the center... more scoring... more cutting... Nada! Then I proceeded to pull out little pieces to see what was going on. I even wondered if these were really cycling shoes! Good fortune... they were indeed SPD compatible cycling shoes. Here's the joke someone at Diadora played on me... the centers that are suppose to be removed were GLUED IN PLACE! Once I knew this life was much easier. Now I know why these shoes were on sale. Is that always the case: "on sale" means "factory goof" but sell em anyway? I don't know, but we now have a pair of clip-in shoes so we can ride safely without worrying about the dreaded 'leg suck'.

The aftermath of preparing Diadora shoes for SPD Cleats:

Friday, December 28, 2007

Truing Trike Wheels

Today was another quiet day watching the skies get grayer and grayer after a brief burst of sunshine. So the forums kept things interesting for a while.

I was thinking this afternoon was a good time to start to commence to consider truing the wheels on PhattKatt. I noted when I first put the trike together that all the wheels had some wow to them. The wobble seemed a lot worse at the time although it turned out all three wheels were within 2mm of true.

Since I set toe adjustment based on spoke position, it was important to have the wheels true to start with. Off I go to find a way to prop up the wheels and for the trike to be stable. I started with the rear by placing the trike on a board and a couple of 4x4's that have been trimmed specifically for setting the toe adjustment on the ABTT.

I "sounded" the spokes to make sure no dud or overly taught spokes were present. Turns out that all the spokes were pretty evenly tensioned on all three wheels. All three wheels were pretty much round as well. All that was needed was a little tweaking of the spokes to straighten out the wobbles.

The adjustment setup was pretty crude. Luckily I already had experience with this on the ABTT, so I proceeded to adjust each wheel. About two hours later, all the wheels were true and dinner was ready.

After dinner, it was time to check the toe adjustment. I had measured the tie rod replacement against the one that came with the trike. From my toe-check today, toe was correct within 1/2 a turn on the new tie rod. Only a test ride on a smooth flat space will let me verify the setting but in the meantime I will line up the wheels on my porch where 2x8's run nicely parallel and I can at least do a sighting down on the wheels.

Only one pic today: truing setup

Wednesday, December 26, 2007

Fine Tuning PhattKatt

.-^ ^-.

Today, PhattKatt got some accessories added:

First things first: a trip to REI and Performance; then a bit of wrenching.

REI offered a great deal on Egg Beater cleats at $17.95 (still waiting for shoes!); they also had the Cateye mirror (great mirror for $7-!), a safety triangle, a spare SRAM quick-link, and a couple of reflective leg straps. Next stop; Performance - needed an Incredibell which was on sale and a pair of full finger gloves to replace my old ones. I also bought some bar ends that I didn't get to use (*).

Once home, I go to add the mirror using the Forte bar end (*). HA! For some reason Big Cat decided the horizontal steering arms didn't need to be "handle bar" sized. Big bummer; no bar ends... So I opted to put the mirror on the left vertical handle end:


I've used this mirror on the ABTT and it is very appropriate for cycling. I didn't want to ruin the fixed SRAM grip so I fitted a foamy as you can see above.

Next; mount the Incredibell (real tough - one screw). Indeed a nice loud bell with a rotating dinger for adjustability. If only people would heed a dinging bell! Oh well; the steering arm upright is now full:


I went off on a tangent and mounted the flag. I had a flag laying around but it was to short to put in the stock location. I also wanted it to be quick release so I put a spare seat clamp on the bottom of neck rest. It has a quick release and was now tall enough so it did not poke me in the eye! I didn't post a picture because I am not quite happy with it yet.

Next, I dug back into my box of goodies and commenced replacing the stock tie rod. In Big Cat's wisdom, they opted to go for two right hand threaded rod ends. This means you have to remove one rod end from the steering arm to make the toe adjustment. I knew all about procedure and also understood why Big Cat would do this but I had already worked out a left and right hand threaded tie rod solution and happened to have the materials to make one for PhattKatt. I use hollow aluminum structural tubing that is properly sized for tapping a 5/16-24 thread. I had a tie rod that was already tapped but was about 3" to long so I cut it to length and re-tapped the one end. After this, I dig through inventory and found the aluminum hex nuts and the lock washers. Put everything together and verified nothing bound up. Working like a charm!


These studded rod ends allow for 50 degrees of offset. This means that throughout the entire steering range (which is when the tires hit the seat frame), the rod ends never bind. Stock rod ends have very little offset capability which causes the rod end to bind on the steering arm which can loosen the tie rod's jam nut. Loose jam nuts on a two right hand threaded tie rod does not change the overall length of the tie rod. Conversely, a tie rod with left and right hand threads needs to make absolutely certain that the jam nuts remain tight. This is easy to do IF the rod ends do not bind. You can see in the picture the small hole in the tie rod. This is to help loosen the jam nuts if necessary. The full motion of the steering is a bit smoother now at the extremes of the steering limits:


BTW: Do note the thread size Big Cat choose for their rod ends. These are plenty beefy (3/8" UNF me thinks!) ...and the tube is also a lightweight aluminum: so I commend Big Cat for their robust design. However, $2- more for the rod ends could have had studs added and go back to left and right hand threads. It is the studs that allow for the larger offset. Maybe someone at Big Cat will read this and rethink this option. For now, I will enjoy the fruits of this effort as I do for the ABTT also.

PhattKatt also came with a Cateye wireless computer. I know, "wireless, bah!" but hey, free (included) is a very good deal. First things first, mount the sensor... Yuck! But again my ever growing spare parts bin has the solution in hand. An aluminum bracket I used for the ABTT steering upgrade happened to fit nicely under the left rod end; and the sensor fit nicely below the bracket... until I thought about transporting the trike with the front wheels removed. This setup would leave the sensor vulnerable. So I moved it to the right side; accepted the less that esthetically perfect bracket implementation and now the sensor is above axle. I could hear the clicking of the reed switch so I knew I was getting a clear reliable signal:


Next; Computer... the horizontal steering arm? "...would be close to the sensor..." but it looked awkward there. "27" unobstructed range"; hmmm. So I zip tied the mount to the frame whiuch is close enough to the sensor and hopefully not overly obstructed. The computer picked up the sensor signal in my living room so hopefully it will work in the field as well:


Last but not least, the Zefel Road Morph also found its way here with the trike. I have the Mountain Morph for the ABTT and it came with an incredibly sturdy mount. I opted to give it a shot on PhattKatt by strapping the pump to the chain stay:


Did you note the nice fit of the rear fender? PhattKatt came with a full set of fenders too. I'm not mounting the front ones yet since the tires make great backup-handles.

In the meantime, I ordered a few things from Nashbar: A helmet, frame bag, oiler, and a few tools. I ordered the full '05 Bell Metropolis kit at $49.95 for me last year and really like the helmet. It works very well with neck rests on a trike compared to road bike helmets. Today I order one for my wife without the accesories for $29.95! She is welcome to use my helmet accesories. She will definitely be using the light that came with my helmet! That MARS 3 is very bright.

If you are still reading this entry, you are really hard core! ...and I appreciate that so please leave your comments.

Here is a pic of the trike after todays wrenching sessions:


Now all we need is some sunlight and take kitty out for a spin :)

Monday, December 24, 2007

Idler Upgrade Details

PhattKatt's 1st Upgrade: Idler

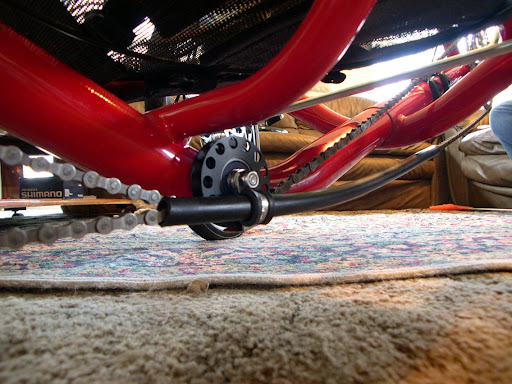
A view from below reveals the subtle upgrade from the stock idler:


Idler developed for the Actionbent Tadpole Trike (TW/Bents trikes):


Flange-nuts were machined to accept a 12mm ID bearing (in hand):


Detailed drawing for the Delrin idler (bearing captured with circlips):


This upgrade was very simple and made for a nice clean chainline on PhattKatt. The first adapter/flange-nut fixed the axle solidly in the frame, and the other half captured the idler solid to the axle. A new chainkeeper was added and the stock nylok hexnut finishes the assembly with the tube-clamp.

This idler has proven itself on the ABTT. 1500 miles and virtually no wear.

PhattKatt's Rebirth; Dec 24th, 2007

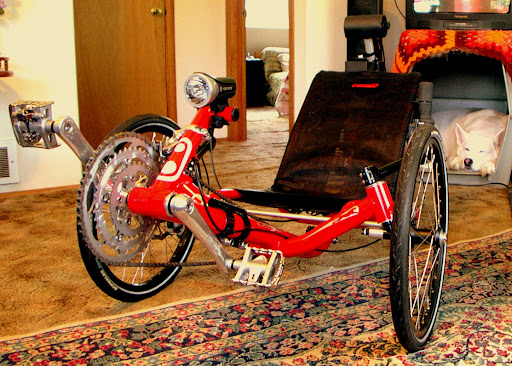
Today, Christmas Eve, the promised red '06 Catrike Road was delivered by UPS. This is a hardly used Catrike purchased form the east coast for a fair value. This Road's s/n is 626. And it arrived in excellent condition.

Within 2 hours, the trike was on the road for a test ride. The same UPS truck came by later and asked if the trike was what was in the big box... "indeed" was replied.

The ride is quite impressive! The quick-release everything, including the axles, will make it quite easy to transport. Cane Creek headsets, 165mm Ultegra Octalink cranks and BB, Avid BB7 disc brakes, new Schwalbe tubes and 406-35 Slicks all around... very impressive componentry.

PhattKatt Reborn